Cauliflower is often known as one of the world’s healthiest foods! It got this distinction because it’s rich in so many nutrients. Cauliflower is an excellent source of vitamin C, vitamin K, folate, pantothenic acid, and vitamin B6. It is a very good source of choline, dietary fiber,omega-3 fatty acids, manganese, phosphorus, and biotin.
Cauliflower has a high-level of anti-inflammatory compounds making it a great choice for your garden! As a member of the cruciferous vegetable family, also known as the Brassica oleracea family. Cruciferous vegetables, including cabbage, broccoli, and Brussel sprouts, are a great source of antioxidants. So now is the time to start planting some cauliflower and reap its wonderful benefits!
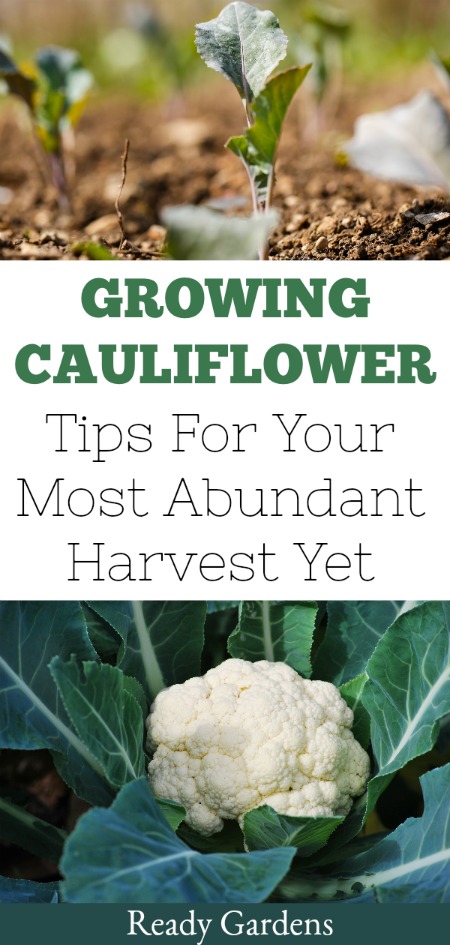
Keep in mind: Cauliflower is a cool-season crop and a descendant of the common cabbage. It is more difficult to grow than its relatives in the Brassica oleracea family because it does not tolerate the heat or cold nearly as well. If you attempt to grow cauliflower in a home garden, it requires consistently cool and steady temperatures in the 60s (Fahrenheit). Otherwise, it may prematurely “button,” forming small, button-size heads rather than a single, large, white head.
Although it is healthy, cauliflower can be difficult to grow. Are you still up for the challenge? If so, consider cauliflower in the fall when the temperatures come down a bit, or early spring before it is too hot.
PLANTING
- Soil needs to be very rich in organic matter. Add composted manure to the soil before planting. Fertile soil holds in moisture to prevent heads from “buttoning.”
- Test your soil! Cauliflower is very picky! The soil pH should be between 6.5 and 6.8.
- Choose a place where the cauliflower will get at least 6 hours of sun.
- It is best to start cauliflower from transplants rather than seeds. Transplant 2 to 4 weeks before the average frost date in the spring, no sooner and not much later, remember, cauliflower is a challenging plant!
- To start from seeds, begin planting 4-5 weeks before transplanting. Choose a seed compost which has a finer texture and lower nutrients than your standard multipurpose compost. With your fingers make small depressions in each cell about a fingernail or 1.5cm deep. Sow 1 or 2 seeds per module in a module tray. If 2 seeds germinate you will have to remove the weaker seedling. Cover the seeds with another layer of compost then scrape across the top of the tray to remove any excess. Gently water your seeds.
- Space your transplants 18 to 24 inches apart with 30 inches between rows. Use a starter fertilizer when transplanting cauliflower.
- Plant fall cauliflower about the same time as fall cabbage. This is usually 6 to 8 weeks before the first fall frost, but after the daytime temperature is below 75 degrees F.
- In early spring, be ready to cover your plants with old milk jugs for protection against frost if needed. For fall crops, shade them if they need protection from the heat.
- Add mulch to conserve moisture if it is needed.
TAKING CARE OF CAULIFLOWER
- Make sure that the plants have an uninterrupted growth. Any interruption can cause the plants to develop a head prematurely or ruin the edible part completely.
- Cauliflower requires consistent soil moisture. They need 1 to 1.5 inches of water each week; even with normal rainfall, this usually requires supplemental watering.
- For best growth, side-dress the plants with a nitrogen fertilizer.
- Be patient! Cauliflower will start out as a loose head and it will take time for the head to fully form. Many varieties take at least 75 to 85 days from transplant.
- When the curd (the white head) is about 2 to 3 inches in diameter, tie the outer leaves together over the head with a rubber band, tape, or twine. This is called blanching, and it protects the head from the sun and helps you get that pretty white color.
- The plants are usually ready for harvest 7 to 12 days after blanching.
HARVEST/STORAGE
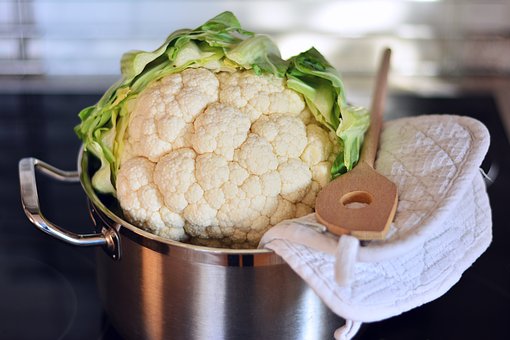
When the heads become compact, white, and firm, it is time to harvest the cauliflower that you’ve patiently waited for! Cut the heads off the plant with a large knife. Be sure to leave some of the leaves around the head to keep it protected. If the heads seem too small but have already begun to open up, they will not improve, so it is time to harvest. A course appearance to the heads means the cauliflower is too mature and it should be tossed out. To store cauliflower, you can put the head in a plastic bag and keep it in the refrigerator for about a week. For long-term storage, you can freeze or pickle the heads.
TROUBLESHOOTING
- Cabbageworm: Cabbageworms eat away at the bases of cabbage, cauliflower, or the heads of broccoli without being noticed. They feed on foliage, and eventually, they can leave plants only with stems and large veins. Nectar from dwarf zinnias lures in ladybugs and other predators that help to protect cauliflower from cabbageworms.
- Cabbage root maggots: Cabbage root maggots are white, legless, and about ⅓ inch long. As with most maggots, they clump in groups and will feed voraciously on root systems of cole crops. Try installing “cabbage collars” at the base of the stem. These can be made from cardboard and will simply be a skirt around the base of the plant. It protects the plants from egg laying.
- Aphids: Aphids are tiny (adults are under ¼-inch), and often nearly invisible to the naked eye. Look for misshapen, curling, stunted, or yellowing leaves. Be sure to check the undersides of leaves; aphids love to hide there. If the leaves or stems are covered with a sticky substance, that is a sign that aphids may have been sipping sap. Buy some ladybugs to help cure the aphid problem. They are a natural predator to the destructive aphid. You can also try spraying cold water on the leaves of the plants.
- Clubroot: This is caused by the soil-borne fungus Plasmodiophora brassicae which infects susceptible plants through root hairs. Diseased roots become swollen, misshapen and deformed (clubbed) often cracking and rotting. Try to prevent the occurrence of this disease by keeping a clean garden and rotating crops, as fungicides will not treat this soil-dwelling micro-organism. You can also “solarize” your soil. For information on how to do that, please click here.
- Black rot: This disease is a bacterium that overwinters in plant refuse for up to 2 years and is carried internally and externally on a seed. The bacterium infects other crucifer crops and weeds. If your cauliflower is infected, issues at leaf margins will become yellow; chlorosis progresses toward the leaf center, creating a V-shaped area with the base of the “V” at the leaf midrib. Veins in these areas become dark brown or black. There are many different steps one can take to eliminate black rot. Please click here to find the way that works best for you.
While cabbage can be a challenge to grow, it will be worth it if you succeed! Maybe it’s not the best vegetable for a beginning gardener, but why not give it a try?