Seeds, as minuscule as they are, have the ability to provide us with continued sustenance. One of the greatest advantages of heirloom or open-pollinated seeds is at the end of the garden season the seeds can be collected, dried, and safely stored for future harvests. If properly cared for, this initial investment of seeds rewards you with free seeds for years to come. But, like many things, there is a timing to this and this guide will help you understand how and when to collect, the best way to store seeds, and understand the longevity of open-pollinated seeds.
Collecting the Seeds
Collecting seeds is an economic way to create your own personal seed bank. According to an article from Modern Farmer, “Bean and pea seeds are not ready until the pod is brown, dry, and beginning to split open. This is true of any seed that grows in a pod, which includes most greens. Corn seed should be allowed to dry on the cob in the field. Some vegetables, including cucumbers and eggplant, should not be picked for seed until they are overripe and beginning to shrivel up and rot.”
The best way to collect seeds is when they are mature and dry on their stalks. Lay them out in a shady spot during warm weather for 2-3 days. Remember: the drier the seed the better. Larger seeds may take longer, so allow for extra drying. Another method to consider is when you have collected the seeds, clean the seeds by removing all vegetable matter from the outer shell. Then, place the seeds in a bowl and cover them with water. Skim off any remaining vegetable matter and any floating seeds; those that float are empty shells, and won’t grow. Drain off the water from the remaining seeds. Once the seeds are cleaned, lay the seeds in a single layer on paper towels and place them in a cool, dry place where they won’t be disturbed. An air-conditioned room is ideal, as the moisture in the air is relatively low. Leave the seeds alone for at least one week, or until they are completely dry. We like to use this seed drying method with pumpkin and squash seeds.
If you plan to cut the seeds pods off of the plant, use sharp, clean gardening tools to cut off your seed heads or pods. This will reduce the likelihood of spreading plant disease. Clean your tools with 10 percent bleach from a spray bottle before you collect seeds. Let your tool dry after spaying on the bleach solution.
Here are some tips for collecting seeds:
- Make sure you choose healthy seeds that are not abnormally shaped, small, or damaged.
- Diversifying and finding seeds with special qualities makes crops less vulnerable to disease, pests, and unusual weather conditions. At times, having identical crop varieties growing will result in crop failure.
- A tip to know when the seeds are ready for storage is to listen to the sound the seeds make when you break them to decide if they are dry enough. When they are dry, large, flat seeds, like pumpkin, they make a “snapping” sound when twisted. Large, thick seeds, like maize or beans, make a “cracking” sound when bitten. And small seeds make a “cracking” sound when squeezed between fingernails.
- A tip to keep birds away from seed pods is to place a small paper bag around the seed head and fastened with a string or rubber band. This will catch the seed before it falls to the ground.
Storing Seeds
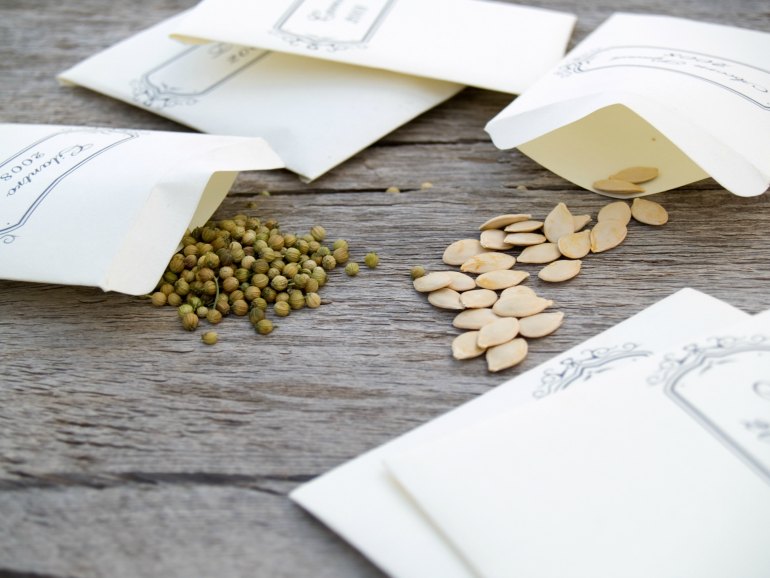
Once your collected seeds are properly dried, it’s time to store them. There are many vessels that can be used to store seeds. While many use an old shoebox, a photo album to store seed envelopes, or Tupperware containers to hold all the seed packages, there are some other containers to consider as well.
- Repurpose used spice bottles and label them with the name and date gathered (here are some on Amazon)
- Glass jars with lid
- Craft bead storage containers
- Paper envelopes
- Small cosmetic jars
Seeds should be stored in a dry, dark place with consistently cool temperatures—such as a cupboard or a dark basement. Ultimately, you want to do all you can to prevent seeds from moisture as excessive moisture can create mold which destroys the viability of seeds. Several gardeners store their seeds in small refrigerators. You do not want your seed to freeze or get wet. as a blast of warm humid air on frozen seeds can damage them. Some gardens who use a Mason jar to store seeds will melt paraffin or candle wax and turn the jars upside down and dip them in it to make an airtight seal around the lid. Another method is to dip a piece of cloth in hot wax and drape it over the opening of the container to seal it. You can also add desiccant pouches to prevent moist air from destroying the seeds. As a side note, ensure stored containers are labeling properly with the seed variety, growing instructions, and date. This will come in handy when using the seeds the next year.
A guide to storing seeds can be read here.
How Long Will Stored Seeds Last?
As far as how long seeds will last, that is entirely up to the storage method you use. If seeds are stored properly, some can last indefinitely. That said, with some seeds that are high in oil content, their germination rates can lower after a few years. Typically, larger seeds like beans, peas, and corn last the longest. If you keep your seeds dry and cool, you can expect many of them to last longer than the time periods indicated here.
- Bush and pole beans – two years
- Beets – two years
- Broccoli, Brussels sprouts, cabbage, cauliflower, and kohlrabi – three to five years
- Carrots – three years
- Collard, Kale – three to five years
- Sweet Corn – one year
- Cucumbers – three years
- Leeks, onions – two to three years
- Lettuce – three years
- Melons – three years
- Oriental greens – three years
- Parsley – two years
- Parsnips – one year
- Peas – two years
- Peppers – two years
- Radishes – four years
- Rutabagas – three years
- Spinach – one season
- Squashes – three to four years
- Swiss Chard – two years
- Tomatoes – three years
Want to hear a seed storage success story? I gave my sister some open-pollinated cabbage seeds in 2013 and she stored them in her refrigerator. It’s been seven years and she is still having germination success with them. This just goes to show that if you take care of your seeds, they have the capacity to last longer.
How To Recover Seeds from the Refrigerator
This part is so important for keeping the quality of seeds! To recover seeds from a cold environment, set out the number of seeds that you plan to grow, and allow the seeds to slowly come to room temperature for 12 hours so. This will prevent moisture from condensing on the seeds. (Remember, moisture = enemy #1)!. Refrain from moving seeds from the refrigerator to room temperature more than once, as each transfer will reduce the viability of the seeds.
Share the Love
With heirloom seeds, you will quickly collect enough for future gardening ventures. So, when your seed “cup runneth over” share them with friends, family, and neighbors!