One of the most important questions many have while on a path to a more self-sufficient life is how to save their seeds year to year. Once you’ve become a pro, you’ll be spending much less time shopping and more time enjoying the simple life.
Seed saving is one of those daunting tasks that seems like it might be just a little too much trouble for what it’s worth, but just trying it once can prove otherwise. Saving your seeds is also incredibly rewarding.
What NOT To Save
It’s important to note that you should not save hybrid seeds. Save seeds only from open-pollinated or heirloom varieties, and there are a few good reasons to do this. An open pollinated plant is one in which the offspring replicates the parents. That means that its seeds will breed true to type. Modern hybrids, which are produced by crossing two or more inbred varieties to obtain specific characteristics (and common in stores), will not produce the same variety that you originally planted. If you save seeds from a hybrid, the next generation reverts to the various parents.
Beginning Seed Saver Information
If you are a beginner, there a few things to also note before attempting to save your seeds. The first thing to be aware of is there are three types of plants: Annual, Biennial, and Perennial. If you know the difference, you’ll know which seeds will be possible for you to save and which ones you won’t have to bother with. Annuals are plants that flower, set seed, and die in a single growing season, such as lettuce, tomatoes, and peppers. Biennials, such as carrots and onions, don’t flower until their second growing season after they have gone through a cold period. Some long-lived plants, like apple trees and asparagus, are considered perennials, which means they survive and flower for many years.
The annual self-pollinating crops are the best to start with when considering saving seeds. Some of these crops, which include peas, beans, lettuce, and tomatoes, are a great beginning point for newer seed savers. These annual, self-pollinating crops require little to no isolation in the garden, and only a few plants are needed to reliably produce seeds for your spring planting.
The first step is to grow enough plants to produce a decent crop of seeds. Some crops have a hard time producing seeds when too few plants are around while others can reproduce with just a single plant. If the population size of a seed crop is too small, some genetic diversity may be lost and over many generations and in time this can result in a noticeable decrease in plant stature, overall vigor, germination, and yield.
How To Save Your Seeds
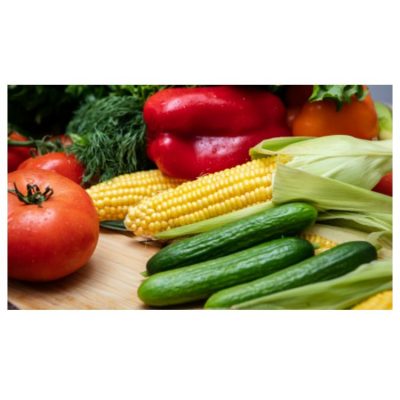
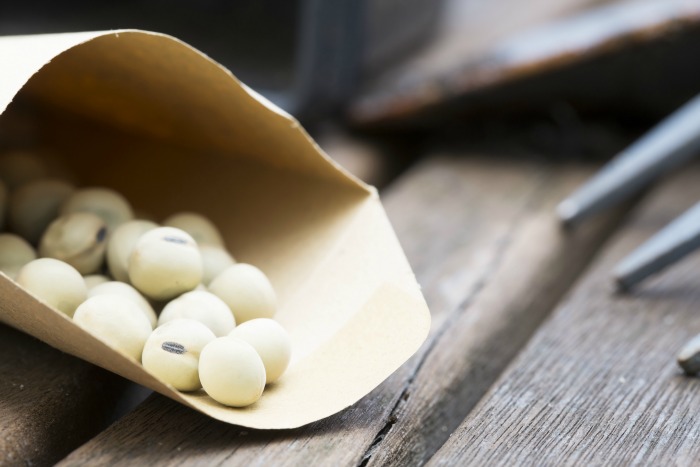
For fleshy vegetables such as tomatoes, squash, and melons, pick the fruits when they are fully ripe. Scoop out their seeds and spread them out to dry in a well-ventilated place. Beans and peas need to be left on the vine until the pods are dry and crackly. Corn should also be left to dry on the stalk until the kernels dent. Other types of seed may be gathered when the fruit or vegetables are fully formed, hard and “meaty.” Remember to collect seeds only from the most vigorous plants in your garden, and not just from the first few ripe specimens you happen to encounter. By selecting seeds from just the healthiest plants, you will select and create a special sub-variety of these crops that are specially adapted to your backyard’s climate and soil.
For an easy breakdown on how to determine if the fruit is ready to have the seeds harvested, please click here for The Almanac’s guide. The Almanac lists the most common varieties of crops people tend to save seeds from and how to tell if its time to harvest the seeds.
*Helpful Tip: label and store your seeds even as they are drying. It’s easy to get confused even if you think you’ll remember which seeds belong to which plant. When laying out my seeds to dry, I use a paper towel and mark it with a ballpoint pen or permanent marker. You can use small envelopes which are easy to mark to store fewer quantities of seeds, and a jar for larger quantities once the seeds are dry.
STORAGE
Generally, your seeds should be clean and dry before they are put away and stored for the winter. The most important factor in keeping your seeds viable for next spring is to make sure they are stored in a cool and dry place. If you store your seeds where the air is moist, they may sprout and/or become mildewed. Mold growth occurs at a faster rate in warm air than it does in cool air. Potato and onion seeds may be stored in open boxes or hung in mesh bags in a place where the temperature is 35 to 40 degrees Fahrenheit, and the air is not overly dry. Seeds will keep for several years if stored correctly, although some have a longer shelf life than others.
Kid Friendly Seed Saving Activity
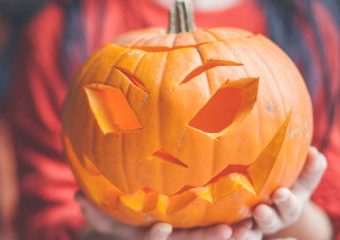 A fun activity to try this autumn is to save some pumpkin seeds! My children absolutely love doing this, and its a really simple and fun family activity that carries into the spring! Many of us actually begin the seed saving process without realizing it when we separate the pumpkin seeds from our kids’ Jack-O-lantern creations and roast them for a tasty treat. This year, consider setting a few of those roasting seeds aside to grow in your garden! Simply rise off a handful of seeds and lay them out to dry for one week. We tend to label the seeds by the children’s names because they get to select which pumpkin they would like to carve. By doing this, they know which pumpkins from last year’s selection grew successfully this year and they get the same number of seeds to each plant in the spring.