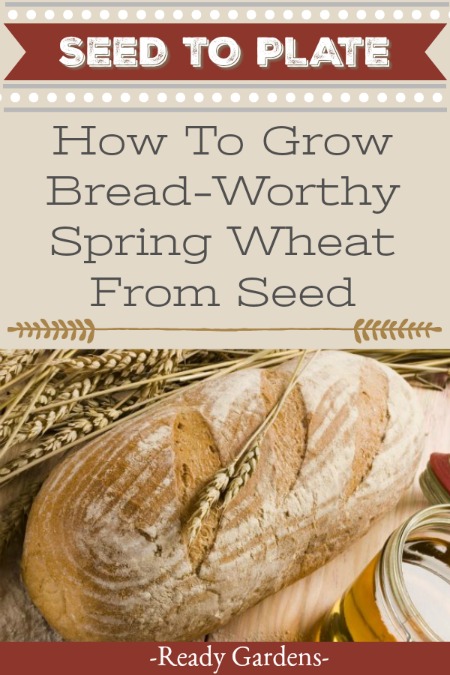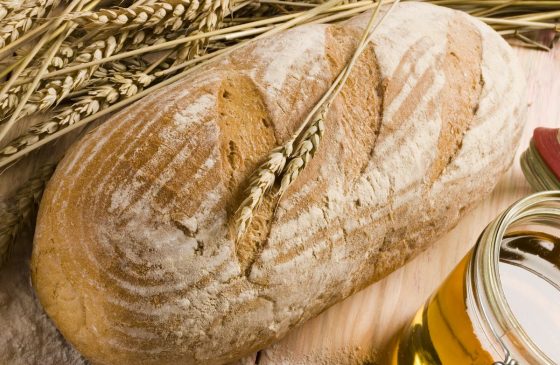
Wheat is one of those staples that’s been getting a bad rap lately. With the current diet trends leaning toward eating carbohydrates, wheat and bread aren’t on the radar of many gardeners. But there are some benefits to growing it, especially if you select the “hard red spring wheat.”
Hard red spring wheat is planted in early spring and yields a bigger harvest than the hard winter spring wheat. HRS wheat also packs in more protein! And you don’t even have to cook this wheat once you’ve harvested it! Just toss some right on your salad and savor the full robust flavor. Wheat also contains the highest fiber content of all the grains and it is a good source of minerals, such as zinc, iron, magnesium, and manganese.
Another added benefit of growing wheat is that you are no longer being forced to support the commercial processing of it. If you’re into gardening and deep into self-sufficiency and prepping, sooner or later you’ll want to try growing wheat because it allows you to get away from the commercial process. That process, unfortunately, grows a perfectly good grain, then scrapes off the bran, peels out the germ, bleaches the flour, and sells all those things back to you separately.
The even better news is that wheat is easy to grow and you’ll be able to yield a substantial crop even with a small amount of space. Even if you only have a space that’s 20 feet by 50 feet (for example), you could plant 6 pounds of wheat and harvest nearly 50 pounds of grain!
PLANTING
- HRS wheat should be planted as soon as the ground becomes workable in the spring. Consider plowing in the fall and towing and silling in the spring.
- If the field has been previously used for farming purposes, smooth the soil with a rake. Dig long trenches using a shovel.
- Use a moderate quantity of natural manure to fertilize the soil and ensure proper growth of the wheat stalks.
- Throw the wheat seeds in the furrows using a semi-circular movement of your wrist. For a dry area, sprinkle a small number of seeds. A heavily cultivated wheat uses up the water in the ground more quickly.
- Water the wheat seeds immediately after planting and once each month during the growing season. If your area gets a lot of rain, you might not need to water the plants at all. Wheat does well in a dry climate, but if your summer is exceptionally dry, you may have to water your wheat twice.
- Use an all-purpose fertilizer twice during the growing season to “nourish” your wheat.
TROUBLESHOOTING
Wheat has surprisingly little problems, but there is one big one:
Birds eating the wheat seeds: Simply place several plastic flags or streamers throughout your wheat patch. The noise made by the plastic blowing in the breeze deters birds from landing and scares off any birds that are already in the field. This will prevent birds from eating the wheat seeds before they have an opportunity to sprout.
HARVESTING & STORAGE
- Make sure the wheat is no longer green at all. The seed heads will start to nod or bow on the stem when they are ready to harvest. That gentle arch will tell you it’s time to pick them before the birds do!
- Cut the individual seed heads off, leaving about 10″ of the stem. If you happen to have more than a 4×4 square foot bed of the crop, use a scythe and cut stalks down near soil level.
- You then must thresh the wheat. Take bundles of wheat and place the stems under a foot. Use your other foot to stomp the seed heads. *Bonus: this can be quite the workout!* You could also invest in a thresher or create your own:
- Winnowing (the process of separating the grain from the chaff) is the next step. Before beginning, use a screen to remove most of the larger bits of seed head chaff. Use a box fan, or do this on a windy day. Set a fan on top of a container so that it points to the top of our collection bucket. Using another bucket, pour the grains from one bucket to the other, in front of the fan. The wind will blow the chaff away because it’s lighter and the grain will fall into the collection bucket.
- Now simply put the grain in the freezer for a few days to kill off any bacteria or small critters. Then transfer it to a lock-lid jar, put it in your pantry, and grind it up as needed!
*Bonus Activity For Kids*
Getting children involved in the process of growing and making their own healthy natural foods has been shown to have a life-long effect on the health and well being of the little person. Help them make healthy food choices now and make it fun in the process! Why no use your wheat as a way to help them understand where their food comes from?
Have your children involved in the process of planting the wheat so they can see just what goes into growing this beneficial grain. The threshing process could be really fun for children too (stomping on the wheat) and it gets them active and moving around which is a double bonus! Once you’ve got enough wheat, have the kids help you choose ingredients for a loaf of bread and make it all your own. Children love to be involved and if they are old enough, let them actually smash up that banana they want to mix in or grab a handful of raisins themselves to toss in the batter for a loaf. Check out a few recipes and get baking!